Zebra Cheesecake Recipe (Easy Chocolate and Vanilla Cheesecake)
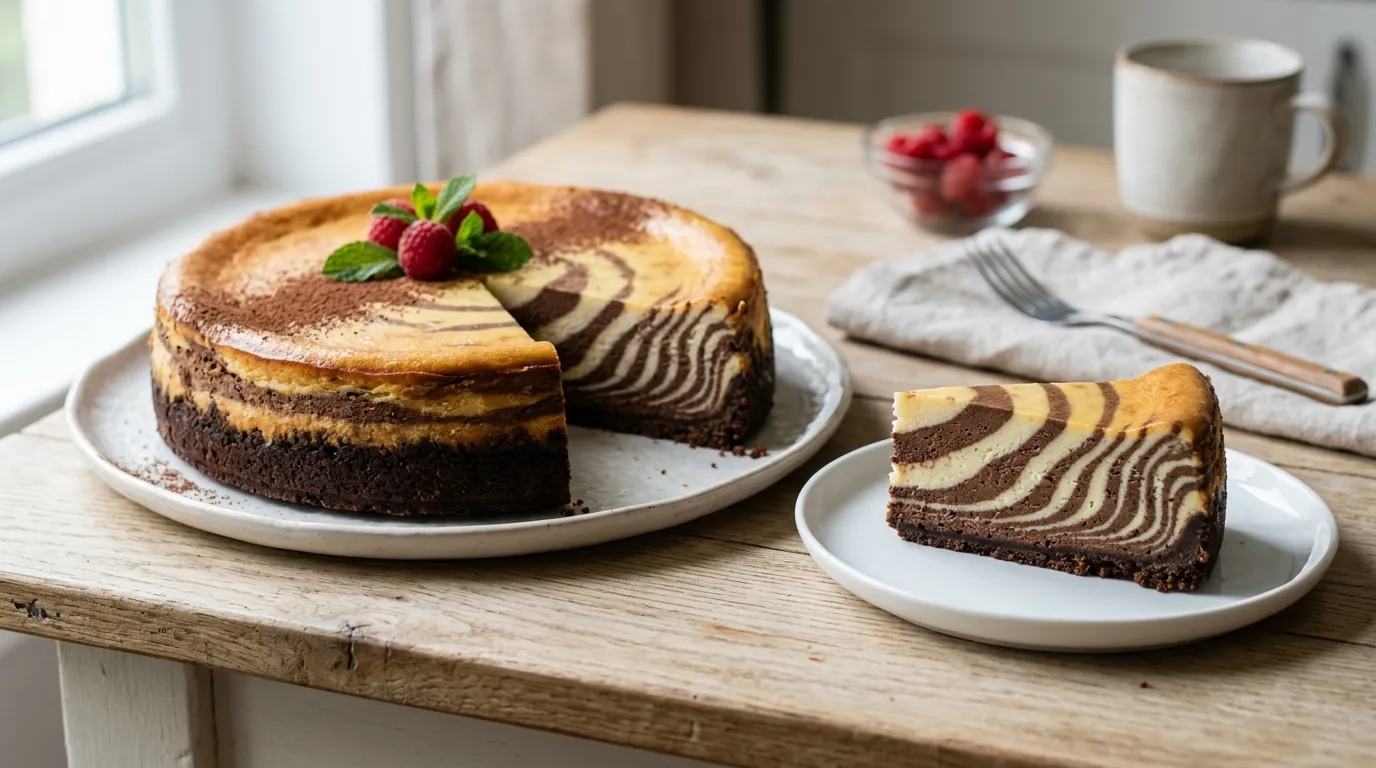
This Zebra Cheesecake is a beautiful, eye-catching dessert that is surprisingly easy to make at home. With its striking chocolate and vanilla stripes, creamy mascarpone filling, and rich chocolate biscuit crust, this cheesecake looks impressive enough for birthdays, family gatherings, and special occasions.
The secret to its beautiful zebra pattern is simple: alternate spoonfuls of vanilla and chocolate cheesecake batter in the center of the pan. As the layers spread outward, they naturally create a gorgeous striped effect.
If you love homemade cheesecake and chocolate desserts, this easy Zebra Cheesecake recipe is a delicious treat to add to your baking collection.
Why You’ll Love This Zebra Cheesecake
- Beautiful zebra pattern: Alternating chocolate and vanilla batter creates an attractive striped design.
- Creamy texture: Mascarpone, ricotta, and cream give the filling a rich, smooth consistency.
- Chocolate biscuit crust: Cocoa and melted butter turn simple biscuits into a delicious base.
- Easy to prepare: The zebra effect looks impressive without requiring special decorating skills.
- Perfect for special occasions: Serve it at parties, celebrations, or as a weekend dessert.
Ingredients for Zebra Cheesecake
For the Chocolate Biscuit Crust
- 180 g (about 6.3 oz) plain dry biscuits or digestive biscuits
- 2 tablespoons unsweetened cocoa powder
- 110 g (about 3.9 oz) butter, melted
For the Cheesecake Filling
- 4 large eggs, separated
- 160 g (about 5.6 oz) granulated sugar
- 1 sachet vanillin or vanilla sugar, or vanilla extract to taste
- 250 g (about 8.8 oz) mascarpone cheese
- 100 g (about 3.5 oz) ricotta cheese
- 200 ml (about ¾ cup plus 1 tablespoon) cooking cream
For the Vanilla Batter
- 4 tablespoons all-purpose flour
For the Chocolate Batter
- 2 tablespoons all-purpose flour
- 2 tablespoons unsweetened cocoa powder
How to Make Zebra Cheesecake
Step 1: Prepare the Biscuit Crust
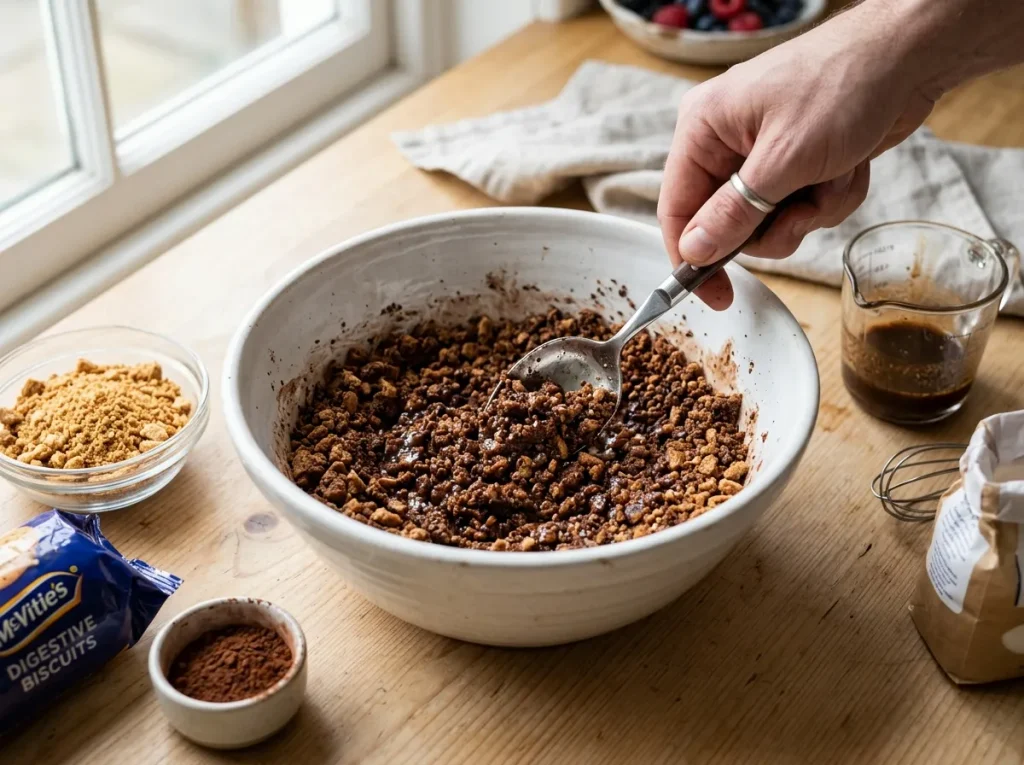
Place the biscuits in a food processor and blend until they become fine crumbs. Transfer the crumbs to a mixing bowl and add the unsweetened cocoa powder.
Pour in the melted butter and mix thoroughly until the crumbs are evenly coated and the mixture resembles wet sand.
Line the bottom of a 24 cm (9.5-inch) springform pan with baking parchment. Transfer the biscuit mixture into the pan and press it firmly into an even layer using the back of a spoon.
Refrigerate the crust for 10 minutes to help it set.
Step 2: Separate the Eggs
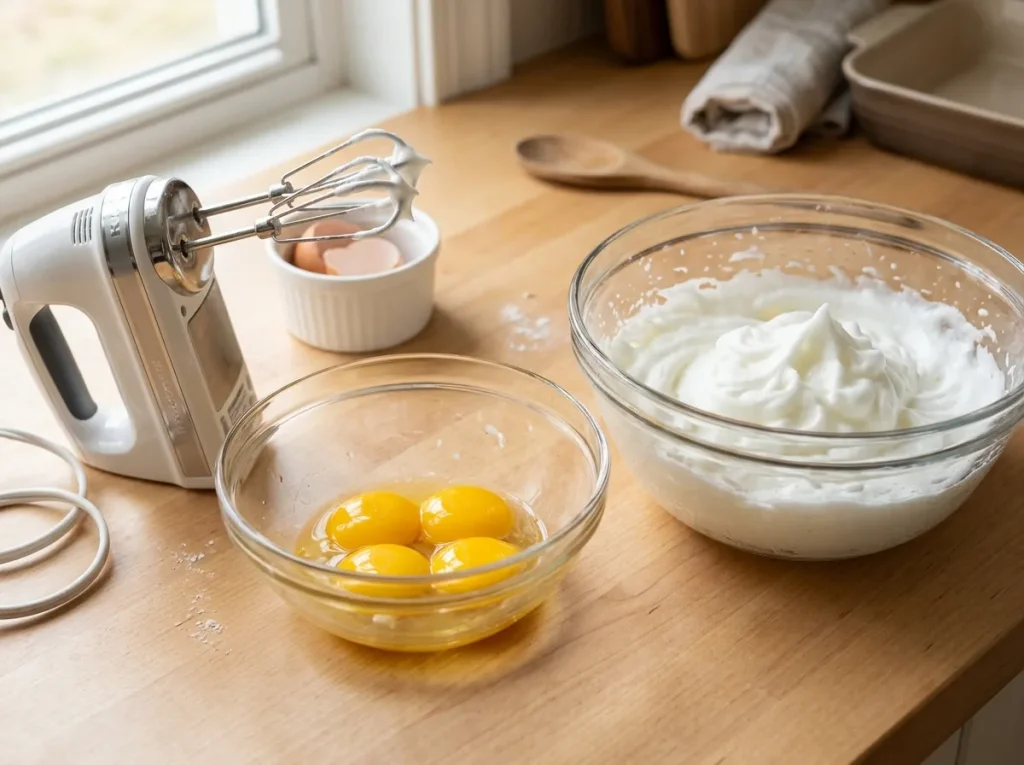
Separate the egg yolks from the egg whites, placing them in two clean bowls.
Using an electric mixer, beat the egg whites until stiff peaks form. Set them aside while you prepare the cheesecake filling.
Step 3: Make the Cheesecake Filling
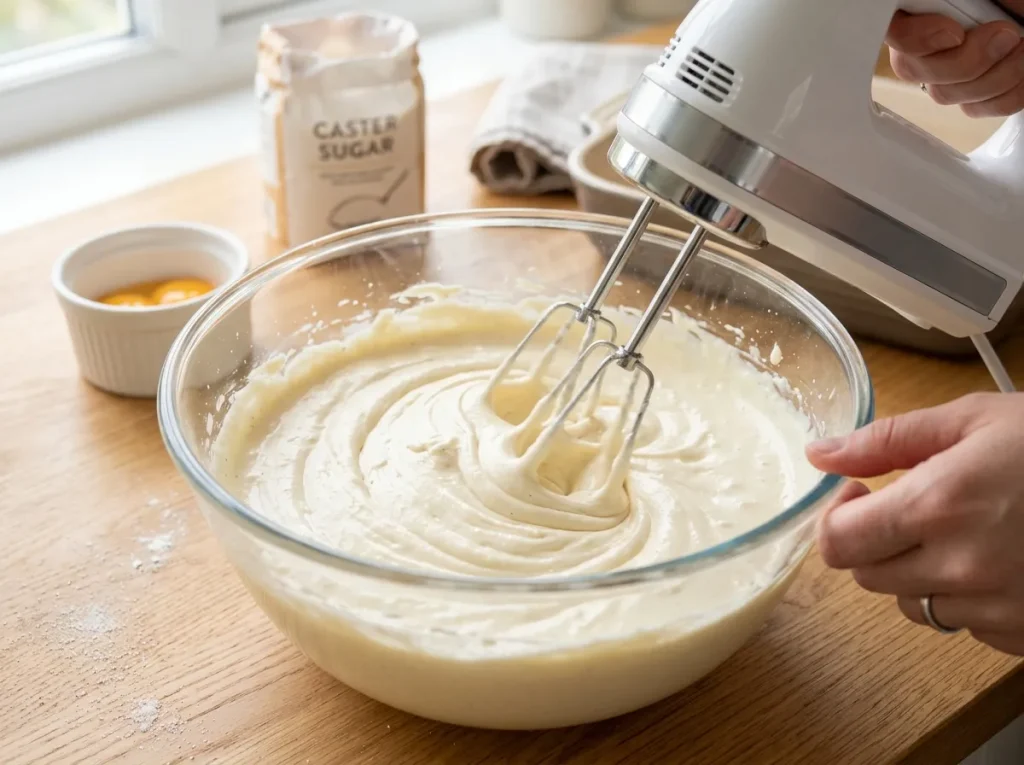
Place the egg yolks in a large mixing bowl. Add the sugar and vanillin or your chosen vanilla flavoring.
Beat with an electric mixer until the mixture becomes pale, thick, and foamy.
Add the mascarpone cheese, ricotta cheese, and cooking cream. Continue mixing until all the ingredients are combined into a smooth, creamy batter.
Step 4: Divide the Batter
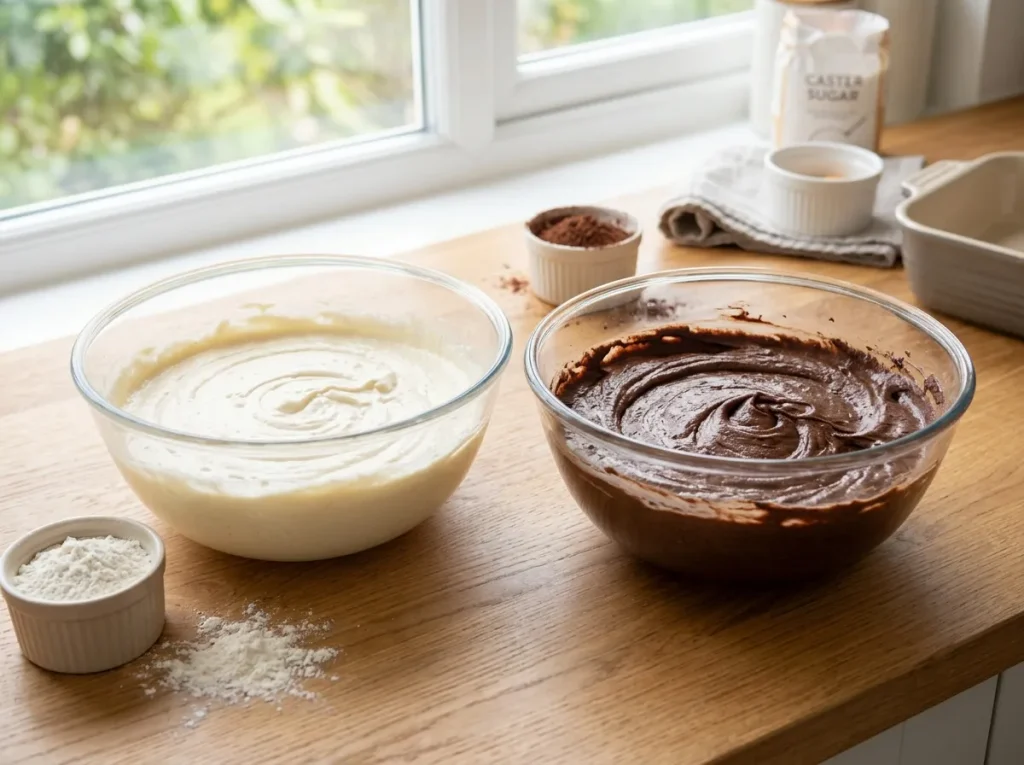
Divide the cheesecake mixture evenly between two bowls.
For the vanilla batter, add 4 tablespoons of all-purpose flour and mix until smooth.
For the chocolate batter, add 2 tablespoons of all-purpose flour and 2 tablespoons of unsweetened cocoa powder. Mix until the cocoa is fully incorporated.
Step 5: Fold in the Egg Whites
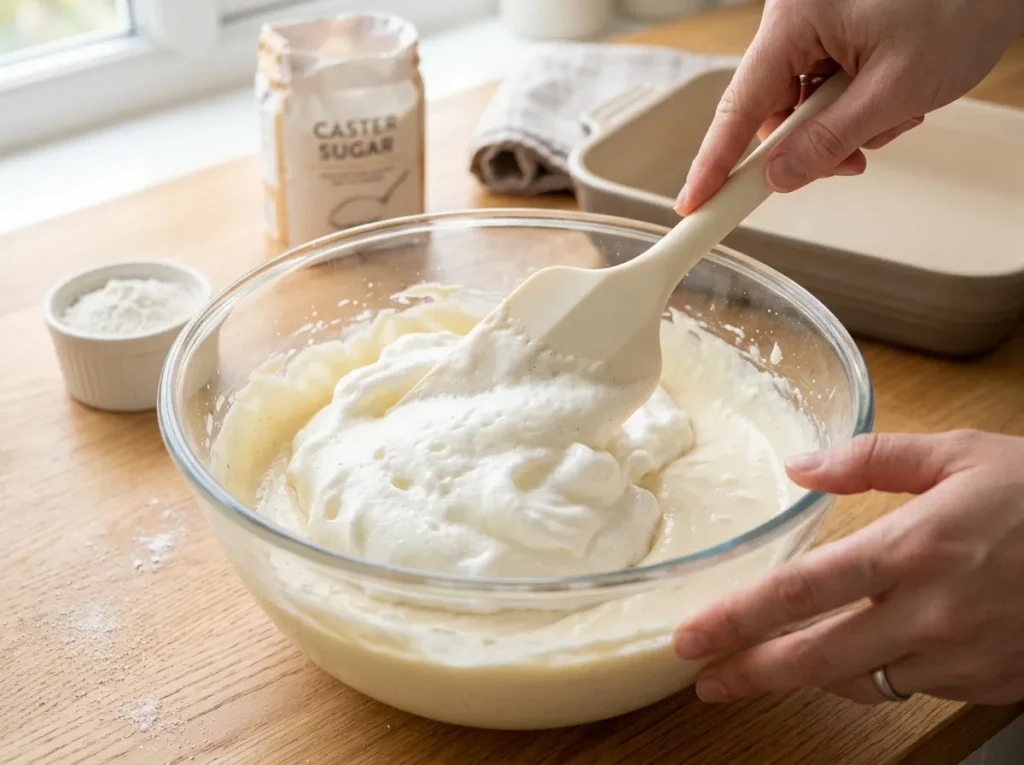
Divide the beaten egg whites equally between the two bowls.
Using a spatula, gently fold half of the egg whites into the vanilla batter and the remaining half into the chocolate batter. Use a slow, bottom-to-top folding motion to preserve as much air as possible.
Both mixtures should be light and evenly combined.
Step 6: Create the Zebra Pattern
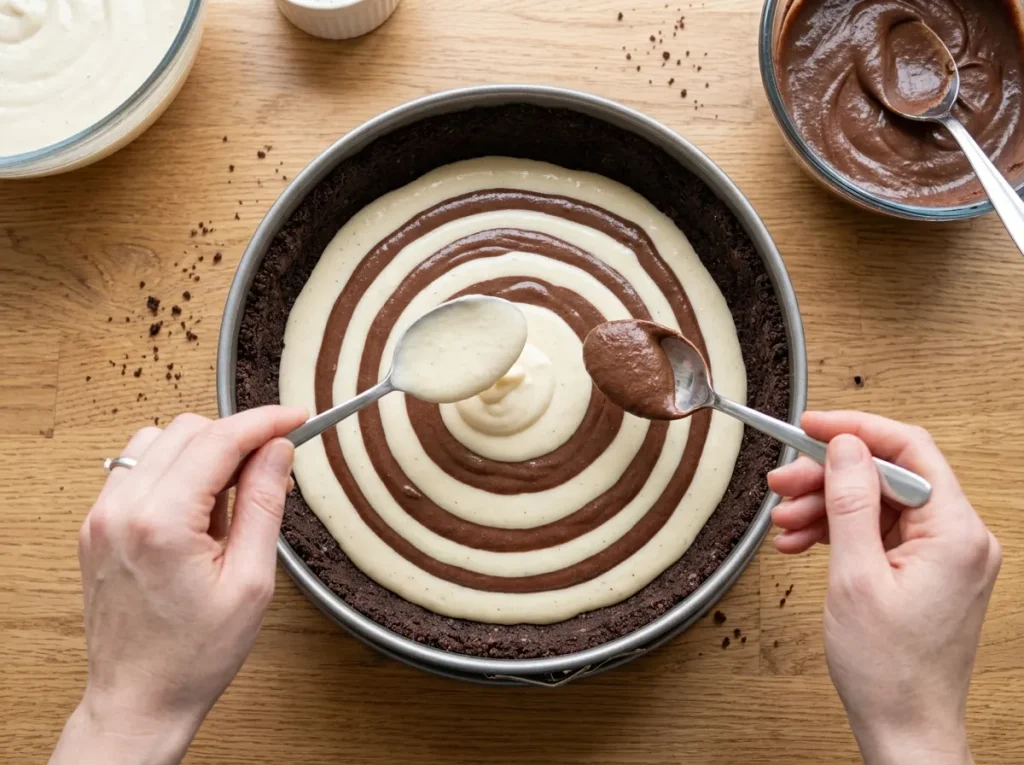
Remove the chilled biscuit crust from the refrigerator.
Spoon 4 tablespoons of vanilla batter into the center of the crust. Then spoon 4 tablespoons of chocolate batter directly into the center of the vanilla mixture.
Continue alternating between 4 tablespoons of vanilla batter and 4 tablespoons of chocolate batter, always pouring each portion into the center of the previous one.
The batter will gradually spread outward, creating beautiful alternating rings of light and dark cheesecake mixture.
Repeat until both batters have been used. Gently shake the pan to help level the surface, taking care not to disturb the pattern.
Step 7: Bake the Cheesecake
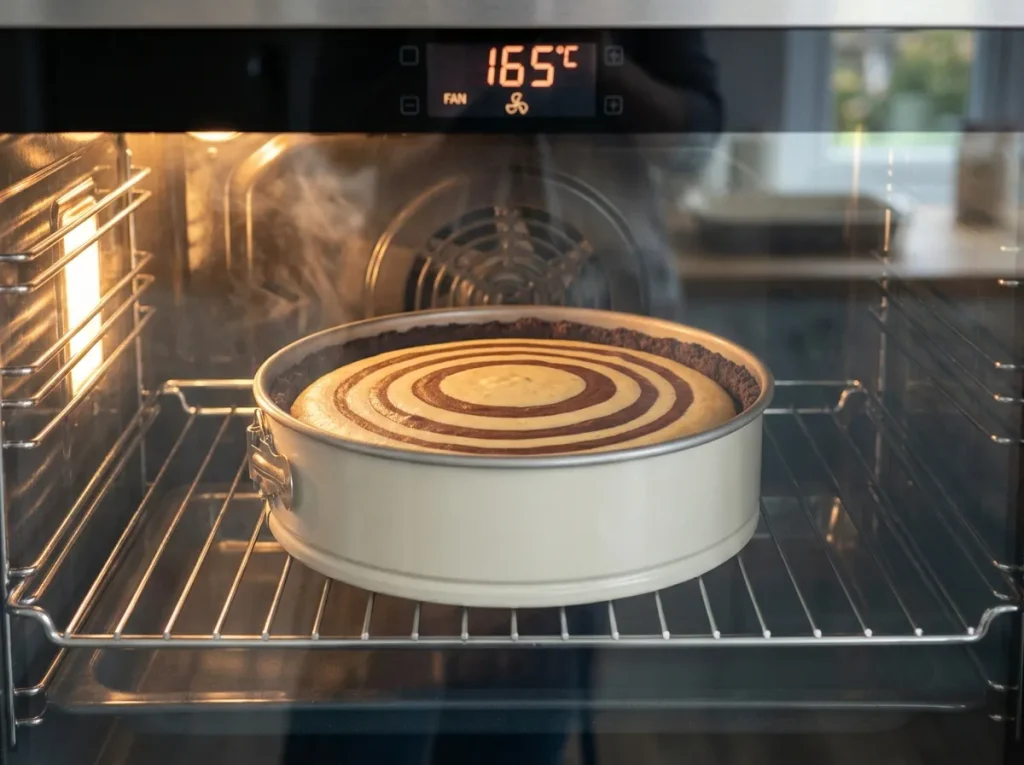
Preheat a fan-assisted oven to 165°C (329°F).
Place the cheesecake in the oven and bake for approximately 50 minutes, or until the edges are set and the center is mostly set with a slight wobble.
Ovens vary, so begin checking near the end of the baking time. Avoid overbaking, as this can make the cheesecake dry or cause cracks.
Step 8: Cool and Serve
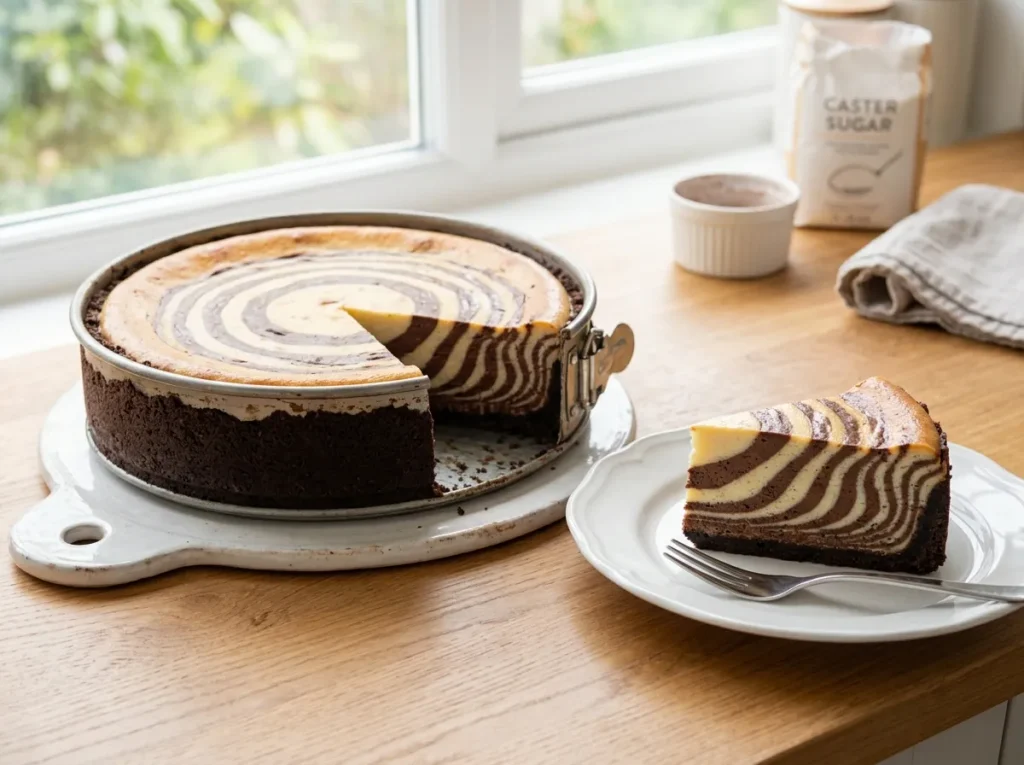
Remove the cheesecake from the oven and let it cool slightly before carefully releasing the springform pan.
For the best texture, allow it to cool completely and refrigerate it for several hours before slicing.
Cut into slices with a clean knife to reveal the beautiful chocolate and vanilla zebra pattern inside.
Your homemade Zebra Cheesecake is ready to serve!
Tips for the Best Zebra Cheesecake
- Use room-temperature ingredients: Mascarpone, ricotta, and eggs combine more easily when they are not too cold.
- Press the crust firmly: A compact biscuit base is less likely to crumble when you slice the cheesecake.
- Fold gently: Avoid stirring vigorously after adding the egg whites, as this can remove the air that helps lighten the filling.
- Always pour into the center: This is the key to creating the distinctive zebra stripes.
- Keep the spoonfuls consistent: Using similar amounts of each batter helps produce a more regular pattern.
- Cool before slicing: Chilling the cheesecake helps the filling firm up and makes cleaner slices.
How to Store Zebra Cheesecake
In the refrigerator: Store the cheesecake in an airtight container or cover it well. Refrigerate for up to 3–4 days.
In the freezer: Individual slices can be wrapped tightly and frozen for up to 2 months for best quality. Thaw overnight in the refrigerator before serving.
Serving suggestion: Serve chilled on its own, or add fresh berries, a light dusting of cocoa powder, or a few chocolate shavings.
Frequently Asked Questions
What makes a cheesecake zebra-style?
A zebra cheesecake is made by alternating chocolate and vanilla batters in the center of the pan. The layers spread outward to form concentric stripes that resemble a zebra pattern.
Can I make Zebra Cheesecake without mascarpone?
Mascarpone gives this recipe its rich, creamy texture. You can experiment with full-fat cream cheese as a substitute, although the flavor and texture may differ.
Why did my zebra pattern not form properly?
The pattern may not develop clearly if the batter is too thick, the spoonfuls are uneven, or each portion is placed off-center. Add each spoonful directly into the center of the previous one.
How do I know when the cheesecake is ready?
The edges should look set, while the center should have only a slight wobble. The cheesecake will continue to firm up as it cools and chills.
Should Zebra Cheesecake be refrigerated?
Yes. Because this cheesecake contains eggs, mascarpone, ricotta, and cream, it should be refrigerated after cooling. Do not leave it at room temperature for more than 2 hours.
Final Thoughts
This easy Zebra Cheesecake combines a chocolate biscuit crust with a creamy two-tone filling to create a dessert that tastes as wonderful as it looks. Its striking pattern is made with a simple layering technique, so you don’t need advanced baking skills to achieve an impressive result.
Make this homemade Zebra Cheesecake for your next celebration or family gathering, and enjoy every creamy, chocolate-and-vanilla slice!